Friday, January 4, 2019

Creating and Deploying Java Web Application on AWS using Elastic Beanstalk

This tutorial is for creating simple java web application using eclipse and then deploying it on AWS cloud.

Video tutorial for creating/deploying web application on java: Creating and Deploying Java Web Application on AWS Elastic Beanstalk Using Eclipse

Table of Content

Development Environment Setup

Setting up the Eclipse

Developing Simple Java Web Application for AWS

  Creating Eclipse Project

  Test Eclipse project on your local environment

  Deploying on AWS

          Creating access keys and configuring those in Eclipse          

                Creating Server in Eclipse which points to server in AWS


Development Environment Setup

First thing is to setup the development environment. For this you would need JDK, eclipse, tomcat. You can download these using the below links provided.

JDK 8 download: https://www.oracle.com/technetwork/java/javase/downloads/jdk8-downloads-2133151.html

Eclipse IDE for Java EE: https://www.eclipse.org/downloads/packages/release/neon/3/eclipse-ide-java-ee-developers

Eclipse plugin for AWS: https://marketplace.eclipse.org/content/aws-toolkit-eclipse

Apache tomcat 8.0: https://tomcat.apache.org/download-80.cgi

Setting up the Eclipse

Once you have downloaded and installed the Eclipse, the next step is to install the AWS Eclipse plugin.

You want you can install the AWS plugin by directly using the link provided in Development Environment Setup. or you can follow below steps to install from within the Eclipse itself.

For installing plugin from Eclipse, go to the Help menu in Eclipse and open "Eclipse Marketplace".

In Eclipse Marketplace you can search and install below AWS plugin.

AWS plugin in eclipse marketplace

Developing Simple Java Web Application for AWS

We will be developing very simple java web application and then we will test it locally and finally deploy on AWS.

We will be creating a simple jsp in a web application which simply displays some text.

Creating Eclipse Project

Here we will be creating regular WTP dynamic web project. You can also create the AWS Web App that comes with AWS toolkit eclipse plugin, but that was giving me some errors while running the project. So its better to create the regular WTP project.

You have to create a new Eclipse Project. Type of the project would be Web --> Dynamic Web Project as below. and click on Next.


create AWS java web application in eclipse


On next screen, you have to provide project name for the web application and click Finish. You can give any name you want over here.

naming AWS java web application in Eclipse


On click of Finish, Eclipse will create the project into your workspace.

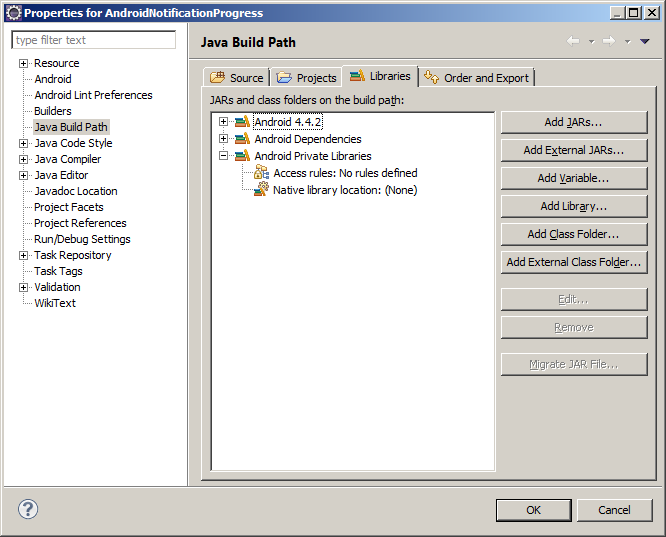
Once the project is created, please make sure you have following versions set in "Project Facets".
We would need Dynamic Web Module set to 3.0 and Java to 1.8.

project facets of AWS java web application in eclipse

Once the project is created, you can add whatever to want in that project like Jsp, Servlets etc..
Here for demonstration we will add only one jsp "index.jsp" under WebContent directory.
Here is a sample content of that jsp.

<%@ page language="java" contentType="text/html; charset=UTF-8"
    pageEncoding="UTF-8"%>
<!DOCTYPE html>
<html>
<head>
<meta charset="UTF-8">
<title>Insert title here</title>
</head>
<body>

This is a test jsp being served from AWS

</body>
</html>


Test Eclipse project on your local environment

Before we deploy the project on AWS, we need to test it locally. As we only have 1 jsp in our sample application, there is no need to test locally, but if you are going to deploy a big project, then it must consider testing that locally before deploying that on AWS.

To test the project locally, you have to create the tomcat server in Eclipse. Download the tomcat from this link: https://tomcat.apache.org/download-80.cgi and follow below steps to create a local tomcat server in Eclipse.

Go to Servers view, right click --> New --> Server. Select Apache and then Tomcat V8.0 Server.

adding tomcat 8.0 server in eclipse

Click on the next and in the next screen provide the tomcat path as below. and click on Finish.

tomcat path in eclipse

You should see the server in the Servers view as below.

eclipse server view - tomcat local server

Now to run the project on this local server, right click on the project --> Run as --> Run on Server.

run web app on tomcat from eclipse

Your application will be deployed on local tomcat and will display demo jsp as below.

running web app on local from eclipse


This way we should test our application locally before deploying on AWS.

Deploying on AWS

Creating access keys and configuring those in Eclipse

To deploy the java web application on AWS, we will be used AWS managed service called "Elastic Beanstalk".  Using this service, AWS will provide the platform to deploy the web application. AWS will provide server machine, JDK, tomcat etc.. whatever required to run the application.

To start deploying the application, you would need to create the access key and configure it in Eclipse.
We will be creating security key for root account. However this is not recommended by AWS. We should always create IAM user in AWS and we should work this that IAM user only.
But as deploying web application on AWS requires many permissions, and if we create the new IAM user then we have to grant those permissions to IAM user.  Rather than doing that, we would be using root account for demo purpose.

So to create the access keys, login to root account on AWS. On the top right corner, click on your username and go to "My Security Credentials". 


navigating to security credentials in AWS management console

In My Security Credentials screen, navigate to "Access keys (access key ID and secret access key)" tab as below. and create new security key. Please note that, you have to copy newly created access keys somewhere before closing the dialog box. Otherwise you won't be able to copy secret key. AWS doesn't allow copying secret keys for root accounts.

Access keys (access key ID and secret access key) in AWS

Now you have to configure these keys into Eclipse. Go to the Eclipse --> Preferences --> AWS Toolkit (from left menu). and paste those security keys there as below.

Eclipse AWS configuration of access keys


Creating Server in Eclipse which points to server in AWS

Now its time to deploy the web application on AWS. For this we would need to create a server in Eclipse which points to the server on AWS. As we don't have any server on AWS, this will create a new server on AWS and link that server to the server we will be creating in Eclipse.

For that right click in Servers view then click on New --> Server. and select Amazon Web Services --> AWS Elastic Beanstalk for Tomcat 8. and click on the Next.

creating server AWS Elastic Beanstalk for Tomcat8 in Eclipse


In the next screen, we have to provide the region, application and environment name as below.


aws elastic beanstalk server region, name and environment name


AWS will create the mentioned application and environment in the provided region on this screen. 
In the next screen it will ask for roles. For now keep the role names as default one. If these roles are not present on AWS then those will be created. 

In the next screen, it will ask for some advanced properties that we are not going to configure right now and those are not needed for our sample application. click on next on advance properties configuration screen.

At last you would see below option, where you have to add your application for deployment on AWS.
and click on finish.


Once the server is created, you would now see 2 servers in the Servers view. One we created for testing on local and other is AWS server. AWS Beanstalk server points to the remote server on AWS. so you will start/stop this server, the remote server will be started/stopped accordingly.

To deploy and run our application on AWS, just run the application on AWS Beanstalk server we just created by right clicking the project --> Run As --> Run as server. it will ask to select the server this time. so select AWS Beanstalk server as below. and click finish.


running java web app on AWS Elastic Beanstalk server from Eclipse


In case it gives the error while deploying and running the application, you have to try running after few minutes later. The error might come because if you are running the application first time, AWS might be creating the platform required for this and it might be timing out. 

To check the status of what AWS is doing when you run the application from Eclipse, go to the AWS console --> Elastic Beanstalk service.
You would see your web application being created there. and it might be creating the environment needed for that.


You can also see the steps performed by AWS in Your Application --> Your environment --> Events section as below.


To access the application you just deployed on AWS, Click on your environment and you would see the link there. 


You should be able to access your application using that url.


Thursday, October 12, 2017

Google added video calling feature to Android 8 straight from Phone and Contacts/People App

As part of the Android 8.0 OS, Google provided new feature to initiate a video call directly from phone and contacts/people app.

This would be a nice feature to make a video call without leaving those apps. This way we don't have to leave those app to start a video call.

Google made this possible using the Google Duo app. It is actually opening that app when you make a video call.

So you will see Video Calling option for those contacts who already have the Google Duo app setup on their phones.

Here is how you will see Video Call option from Phone app.


And below is how you will see that option from Contacts app.


Thursday, September 4, 2014

Missing Android Private Libraries in Build Path

I recently came across the following error while creating a new android application project in eclipse.
My project has dependencies to appcompat_v7 project.


Found 2 versions of android-support-v4.jar in the dependency list,
but not all the versions are identical (check is based on SHA-1 only at this time).
All versions of the libraries must be the same at this time.
Versions found are:
Path: D:\rohit\eclipse_workspace\AndroidNotificationProgress\libs\android-support-v4.jar
Length: 758727
SHA-1: efec67655f6db90757faa37201efcee2a9ec3507
Path: D:\rohit\eclipse_workspace\appcompat_v7\libs\android-support-v4.jar
Length: 648327
SHA-1: ded9acc6a9792b8f1afc470f0c9cd36d178914cd
Jar mismatch! Fix your dependencies

Fortunately i found the solution. If you have recently updated your android SDK then that could be the cause of this error.

If you also got this type of error, then follow below steps to fix it.

First of all, if you have any android-support-xx.jar file in your project’s libs directory then delete it.

1) Check your Project Properties → Java Build Path. It will have Android Private Libraries missing as shown in below screenshot.

missing private libraries.png

2) Go to Project Properties → Android . Copy the SDK path configured in this as below.

android sdk path.png

3) Go to the directory : <android-sdk-home>\extras\android\support\v7\appcompat\libs You will find below 2 files there. android-support-v4.jar android-support-v7-appcompat.jar Copy these 2 files. and paste it to your appcompat_v7 project’s lib directory in your workspace. <your-workspace-dir>\appcompat_v7\libs 4) Clean and build both the project. appcompat_v7 and the one on which you got the error.

Tuesday, September 2, 2014

Downloading file from android webview over https (ssl)

If you are using android version lower than 4.1.2 ( API16), then downloading a file from android webview over https (ssl) might not work properly.

Please go through this post first : Downloading file from android webview , for instructions on how to download it over http.
Same instructions will be applicable for https including the additional instructions described in  below steps.

In android version lower than 4.1.2 , download manager doesn't handle https protocol. so you have to copy that class to your project and have to use it instead of that from sdk.

You should not use that custom download manager for all android targets. Because for newer versions that class already handles https. and some additional features might have been added to it.
So you can conditionally check for versions and use either of download manager.

if(android.os.Build.VERSION.SDK_INT<16) //for android 4.1.2 or lower
{
 com.test.android.app.DownloadManager downloadManager = new com.test.android.app.DownloadManager(getContentResolver(), "com.test"); // you have to provide your application package here
 com.test.android.app.DownloadManager.Request request = new com.test.android.app.DownloadManager.Request(Uri.parse(url));
 request.setDestinationInExternalPublicDir(Environment.DIRECTORY_DOWNLOADS, "app_download_directory");
 downloadManager.enqueue(request);
}
else //for newer version, use download manager from sdk
{
 Request request = new Request(Uri.parse(url));
 request.allowScanningByMediaScanner();
 request.setDestinationInExternalPublicDir(Environment.DIRECTORY_DOWNLOADS, "app_download_directory");
 DownloadManager dm = (DownloadManager) getSystemService(DOWNLOAD_SERVICE);
 dm.enqueue(request);
}

You have to add 2 SDK classes in your project : android.app.DownloadManager , android.provider.Downloads

You can download it from here : Download source files

Copy these 2 classes in your project and refer those in above code snippet. (replace com.test with your project’s package)


Downloading file from android webview

Here we will see how to download a file from android webview over http.
If you are downloading over https (ssl) then refer to this tutorial : Downloading file from android webview over https (ssl)

You might have used webview in your android application. but if your webview’s html has download link then it might not work directly.

If you are downloading over http protocol then continue reading this post. But if you are downloading over https (ssl) then you may continue reading this but you will also need some additional code to be added for that. Please refer this post for more information after reading current post : Downloading file from android webview over https (ssl).

There are 2 ways to download the file from within android webview.

1) Downloading a file by directly using android download manager.
2) Downloading a file by using a web browser opened from android webview. Browser will take care of downloading a file. It will internally use download manager.

When you download a file using a download manager, a notification will appear in the notification bar and you can check the progress there as below.

downloading-file-from-webview.png

We will be creating a simple android app with only one activity. This will have only webview inside it.  
Webview will load html which will have download link. and on click of which we will download a target file using download manager and web browser as well.

First of all following properties will be needed in android manifest file.

<uses-permission android:name="android.permission.INTERNET"></uses-permission>
 <uses-permission android:name="android.permission.WRITE_EXTERNAL_STORAGE"/>

WRITE_EXTERNAL_STORAGE is required if you have to download the file to sdcard.
If you are going to test the sample app using android emulator, then you have to enable sdcard on it, as shown in below screenshot of virtual device properties from AVD manager.

android-emulator-sdcard-setting.png

Below is the activity’s layout xml.

<RelativeLayout xmlns:android="http://schemas.android.com/apk/res/android"
    xmlns:tools="http://schemas.android.com/tools"
    android:layout_width="match_parent"
    android:layout_height="match_parent"
    tools:context="${relativePackage}.${activityClass}" >

    <WebView        
        android:id="@+id/webView1"
        android:layout_width="fill_parent"
        android:layout_height="fill_parent" />

</RelativeLayout>

1) Downloading a file directly using android download manager

Following code will set the download listener for webview and will directly use download manager to download a file.


webView.setDownloadListener(new DownloadListener()
  {
   public void onDownloadStart(String url, String userAgent, String contentDisposition, String mimetype, long contentLength)
   {
    //for downloading directly through download manager
    Request request = new Request(Uri.parse(url));
    request.allowScanningByMediaScanner();
    request.setNotificationVisibility(DownloadManager.Request.VISIBILITY_VISIBLE_NOTIFY_COMPLETED);
    request.setDestinationInExternalPublicDir(Environment.DIRECTORY_DOWNLOADS, "download");
    DownloadManager dm = (DownloadManager) getSystemService(DOWNLOAD_SERVICE);
    dm.enqueue(request);
   }
  });

In the above code, if you don’t have sdcard on emulator/device, then you can use internal storage to store a file, by commenting this line.

request.setDestinationInExternalPublicDir(Environment.DIRECTORY_DOWNLOADS, "download");

2) Downloading a file using a web browser opened from android webview

This will send an intent to web browser and web browser will take care of downloading the file. It will internally use download manager to download a file.

webView.setDownloadListener(new DownloadListener()
  {
   public void onDownloadStart(String url, String userAgent, String contentDisposition, String mimetype, long contentLength)
   {    
    //download file using web browser
    Intent i = new Intent(Intent.ACTION_VIEW);
    i.setData(Uri.parse(url));
    startActivity(i);
   }
  });

If you are downloading over https (ssl) then refer to this tutorial : Downloading file from android webview over https (ssl)


Wednesday, August 27, 2014

Google Cloud Messaging for Android (GCM) with example

Table of Content


             Creating a Google API project
                          Enabling the GCM Service
                          Obtaining an API Key
             Implementing GCM Client
                          Step 1: Setup Google Play Services
                          Step 2 : Application’s manifest configuration
                          Step 3: Write Your Application
                                       MainActivity layout xml
                                       Receive a message
             Implementing a GCM Server
                          Project Setup
                          Writing code to send message to android device
             Sample App Downloads:
                          Android sample app
                          Java server application for sending GCM messages

GCM Concept

Google Cloud Messaging for Android (GCM) is a free service that helps developers send data from servers to their Android applications on Android devices, and upstream messages from the user's device back to the cloud (upstream messages are only supported in XMPP).

The message could be a ligh message telling the Android application that there is new data to be fetched from the server (for instance, a "new email" notification informing the application that it is out of sync with the back end), or it could be a message containing up to 4kb of payload data (so apps like instant messaging can consume the message directly).

Entities involved in GCM

Components : The entities that play a primary role in GCM.
Credentials : The IDs and tokens that are used in different stages of GCM to ensure that all parties have been authenticated, and that the message is going to the correct place.

Components

Client App
The GCM-enabled Android application that is running on a device. This must be a 2.2 Android device that has Google Play Store installed, and it must have at least one logged in Google account if the device is running a version lower than Android 4.0.4. Alternatively, for testing you can use an emulator running Android 2.2 with Google APIs.
3rd-party Application Server
An application server that you write as part of implementing GCM. The 3rd-party application server sends data to an Android application on the device via the GCM connection server.
GCM Connection Servers
The Google-provided servers involved in taking messages from the 3rd-party application server and sending them to the device.
Credentials

Sender ID
A project number you acquire from the API console. The sender ID is used in the registering android device to connection server.
Application ID
The Android application that is registering to receive messages. The Android application is identified by the package name from the manifest. This ensures that the messages are targeted to the correct Android application.
Registration ID
An ID issued by the GCM servers to the Android application that allows it to receive messages. Once the Android application has the registration ID, it sends it to the 3rd-party application server, which uses it to identify each device that has registered to receive messages for a given Android application. In other words, a registration ID is tied to a particular Android application running on a particular device. Note that registration IDs must be kept secret.


Note: If you use backup and restore, you should explicitly avoid backing up registration IDs. When you backup a device, apps backup shared prefs indiscriminately. If you don't explicitly exclude the GCM registration ID, it could get reused on a new device, which would cause delivery errors.
Google User Account
For GCM to work, the mobile device must include at least one Google account if the device is running a version lower than Android 4.0.4.
Sender Auth Token
An API key that is saved on the 3rd-party application server that gives the application server authorized access to Google services. The API key is included in the header of POST requests that send messages.

Implementation:

Before you begin, make sure to set up the Google Play Services SDK. You need this SDK to use the GoogleCloudMessaging methods.

Creating a Google API project

The first thing is to get the sender ID described above. Its the project number of the project created in Google Developer Console.

You have to create a new project there and have to get the project number. This would be your GCM Sender ID to be used in registering android device to GCM.

In the sidebar on the left, select APIs & auth.
In the displayed list of APIs, turn the Google Cloud Messaging for Android toggle to ON.


1) In the sidebar on the left, select APIs & auth > Credentials.
2) Under Public API access, click Create new key.
3) In the Create a new key dialog, click Server key.
4) In the resulting configuration dialog, supply your server's IP address. For testing purposes, you can use 0.0.0.0/0
5) Click Create.
6) In the refreshed page, copy the API key. You will need the API key later on to perform authentication in your application server.

Note: If you need to rotate the key, click Regenerate key. A new key will be created. If you think the key has been compromised and you want to delete it immediately, click Delete.


Setup is done. Now you have to implement below components.

1) GCM Server : Java application which will be hosted on application server. This will send messages to GCM connection servers, which in turn deliver messages to android application running on android devices.
2) GCM Client : Android application
3) Decide which GCM connection server you want to use (HTTP or XMPP)


Implementing GCM Client

A GCM client is a GCM-enabled app that runs on an Android device.

We will implement a below simple android application which will register with gcm connection server and generate registration id to be used by 3rd party application server for sending the message to the same android device.


gcm sample android application

This android app must have below 2 functionalities.

1) It must include a code to register android device to GCM connection server and thereby get a registration ID.
2) It must include a broadcast receiver to receive messages sent by GCM server.

Step 1: Setup Google Play Services

To write your client application, we will use GoogleCloudMessaging API. 
To use this API, you must set up your project to use the Google Play services SDK, as described in Setup Google Play Services SDK setup.

Also if you are using android emulator to test the gcm application, then you have to use emulator for android version >= 4.1.2 . 
and while creating AVD you have to select Google APIs as a target. 
If you don’t have Google APIs not available as a target, then open SDK manager and download the same. Once you make any change in SDK manager (install/remove packages), then you have to restart your eclipse to make those changes available in AVD manager.

1) Following meta tag must be present under application tag. This is required if you are using google play services SDK.

<meta-data android:name="com.google.android.gms.version" android:value="@integer/google_play_services_version" />

2) Add permission : com.google.android.c2dm.permission.RECEIVE


<uses-permission android:name="com.google.android.c2dm.permission.RECEIVE" />


This is required so the application can register to get registration id and to receive messages sent by GCM server.

3) Add permission : android.permission.INTERNET

<uses-permission android:name="android.permission.INTERNET" />

4) Add permission : android.permission.GET_ACCOUNTS

<uses-permission android:name="android.permission.GET_ACCOUNTS" />

This is to get user account information as GCM requires a Google account (necessary only if if the device is running a version lower than Android 4.0.4).

5) An applicationPackage + ".permission.C2D_MESSAGE" permission to prevent other Android applications from registering and receiving the Android application's messages. The permission name must exactly match this pattern—otherwise the Android application will not receive the messages.

lets consider applicatonPackage as "com.example.gcm" , then the entry would be like : 

<permission android:name="com.example.gcm.permission.C2D_MESSAGE" android:protectionLevel="signature" />
<uses-permission android:name="com.example.gcm.permission.C2D_MESSAGE" />

6) A broadcast receiver for getting messages sent by 3rd party application server. This should be an instance of WakefulBroadcastReceiver.

The receiver should require the com.google.android.c2dm.SEND permission, so that only the GCM Framework can send a message to it.

<receiver android:name=".GcmBroadcastReceiver" android:permission="com.google.android.c2dm.permission.SEND" >
 <intent-filter>
         <action android:name="com.google.android.c2dm.intent.RECEIVE" />
                <category android:name="com.example.gcm" />  <!-- application package name -->
        </intent-filter>
</receiver>

7) A Service (typically an IntentService) to which the WakefulBroadcastReceiver passes off the work of handling the GCM message, while ensuring that the device does not go back to sleep in the process.

You could choose to process your messages in a regular BroadcastReceiver instead, but realistically, most apps will use a IntentService.

<service android:name=".GcmIntentService" />

8) If the GCM feature is critical to the Android application's function, be sure to set android:minSdkVersion="8" or higher in the manifest. This ensures that the Android application cannot be installed in an environment in which it could not run properly.

Step 3: Write Your Application

Finally write your application.
In this section we will only see how to register to GCM connection server and get registration Id using GoogleCloudMessaging APIs. 

This contains one edittext which will hold registration id. and one button onclick of which we will the register application to GCM.

<RelativeLayout xmlns:android="http://schemas.android.com/apk/res/android"
    xmlns:tools="http://schemas.android.com/tools"
    android:layout_width="match_parent"
    android:layout_height="match_parent"
    tools:context="${relativePackage}.${activityClass}" >

    <TextView
        android:id="@+id/lbl_reg_id"
        android:layout_width="wrap_content"
        android:layout_height="wrap_content"
        android:text="GCM Registration ID: " />

    <EditText
        android:id="@+id/txt_reg_id"
        android:layout_width="fill_parent"
        android:layout_height="wrap_content"
        android:layout_below="@id/lbl_reg_id"/>

    <Button
        android:id="@+id/btn_reg_device"
        android:layout_width="wrap_content"
        android:layout_height="wrap_content"
        android:layout_below="@id/txt_reg_id"
        android:text="Get Registration ID"
        android:onClick="onClickRegDevice" />

</RelativeLayout>

MainActivity.java (Google Play Services APK compatibility check on android device and GCM registration)

Following functionalities have been implemented in this.
1) Checking whether android device has google play service APK. If not then displaying appropriate dialog box to download and install it.
2) Registering with GCM to get registration ID to be used by 3rd party application.

package com.example.gcm;

import java.io.IOException;

import android.app.Activity;
import android.content.Context;
import android.content.SharedPreferences;
import android.content.pm.PackageInfo;
import android.content.pm.PackageManager.NameNotFoundException;
import android.os.AsyncTask;
import android.os.Bundle;
import android.util.Log;
import android.view.View;
import android.widget.EditText;
import android.widget.Toast;

import com.google.android.gms.common.ConnectionResult;
import com.google.android.gms.common.GooglePlayServicesUtil;
import com.google.android.gms.gcm.GoogleCloudMessaging;

public class MainActivity extends Activity
{
 private final static int PLAY_SERVICES_RESOLUTION_REQUEST = 9000;
 public static final String PROPERTY_REG_ID = "registration_id";
 private static final String PROPERTY_APP_VERSION = "appVersion";

 private static String SENDER_ID = "601094561";
 private GoogleCloudMessaging gcm = null;

 private EditText txt_reg_id = null;

 @Override
 protected void onCreate(Bundle savedInstanceState)
 {
  super.onCreate(savedInstanceState);
  setContentView(R.layout.activity_main);

  txt_reg_id = (EditText) this.findViewById(R.id.txt_reg_id);

  if (checkPlayServices())
  {
  }
  else
  {
   Toast.makeText(this, "This device is not supported.", Toast.LENGTH_LONG).show();
  }
 }

 public void onClickRegDevice(View view)
 {
  System.out.println("in onClickRegDevice.. view = " + view);

  // get registration id from shared preferences and thus check whether app is already registered or not.
  String regid = getRegistrationId(this);
  Log.i(this.toString(), "registration id from shared pref : " + regid);

  if (regid.isEmpty()) // if blank, then app is not yet registered
  {
   registerInBackground();
  }
  else
  {
   txt_reg_id.setText(regid);
  }
   
 }

 /**
  * this method will check whether device has google play services apk installed or not. if not then it will display appropriate dialog.
  */
 private boolean checkPlayServices()
 {
  int resultCode = GooglePlayServicesUtil.isGooglePlayServicesAvailable(this);
  if (resultCode != ConnectionResult.SUCCESS)
  {
   if (GooglePlayServicesUtil.isUserRecoverableError(resultCode))
   {
    GooglePlayServicesUtil.getErrorDialog(resultCode, this, PLAY_SERVICES_RESOLUTION_REQUEST).show();
   }
   else
   {
    Log.i(this.toString(), "This device is not supported.");
    finish();
   }
   return false;
  }
  return true;
 }

 /**
  * get gcm registration id from shared preferences. once app is registered to gcm and got the registration id, it will store that in shared
  * preferences.
  * 
  * returns blank when no registration id found in shared pref. if app was updated, then also it will return blank so that app can be registered
  * again.
  */
 private String getRegistrationId(Context context)
 {
  final SharedPreferences prefs = getGCMPreferences(context);
  String registrationId = prefs.getString(PROPERTY_REG_ID, "");
  if (registrationId.isEmpty())
  {
   Log.i(this.toString(), "Registration not found.");
   return "";
  }
  // Check if app was updated; if so, it must clear the registration ID
  // since the existing regID is not guaranteed to work with the new app version.
  int registeredVersion = prefs.getInt(PROPERTY_APP_VERSION, Integer.MIN_VALUE);
  int currentVersion = getAppVersion(context);
  if (registeredVersion != currentVersion)
  {
   Log.i(this.toString(), "App version changed.");
   return "";
  }
  return registrationId;
 }

 /**
  * store registration id and app version in shared preferences.
  */
 private void storeRegistrationId(Context context, String regId)
 {
  final SharedPreferences prefs = getGCMPreferences(context);

  int appVersion = getAppVersion(context);
  Log.i(this.toString(), "Saving regId on app version " + appVersion);

  SharedPreferences.Editor editor = prefs.edit();
  editor.putString(PROPERTY_REG_ID, regId);
  editor.putInt(PROPERTY_APP_VERSION, appVersion);
  editor.commit();
 }

 private SharedPreferences getGCMPreferences(Context context)
 {
  // This sample app persists the registration ID in shared preferences, but
  // how you store the regID in your app is up to you.
  return getSharedPreferences(MainActivity.class.getSimpleName(), Context.MODE_PRIVATE);
 }

 private static int getAppVersion(Context context)
 {
  try
  {
   PackageInfo packageInfo = context.getPackageManager().getPackageInfo(context.getPackageName(), 0);
   return packageInfo.versionCode;
  }
  catch (NameNotFoundException e)
  {
   throw new RuntimeException("Could not get package name: " + e);
  }
 }

 private void registerInBackground()
 {
  new AsyncTask<String, Void, String>()
  {
   private String regId = "";

   @Override
   protected String doInBackground(String... params)
   {
    String msg = "";
    try
    {
     if (gcm == null)
     {
      gcm = GoogleCloudMessaging.getInstance(MainActivity.this);
     }
     regId = gcm.register(SENDER_ID);
     Log.i(this.toString(), "regId = "+regId);

     // You should send the registration ID to your server over HTTP,
     // so it can use GCM/HTTP or CCS to send messages to your app.
     // The request to your server should be authenticated if your app
     // is using accounts.
     // sendRegistrationIdToBackend();

     // For this demo: we don't need to send it because the device
     // will send upstream messages to a server that echo back the
     // message using the 'from' address in the message.

     // Persist the regID - no need to register again.
     storeRegistrationId(MainActivity.this, regId);
     
     msg = regId;
    }
    catch (IOException ex)
    {
     msg = "Error :" + ex.getMessage();
     // If there is an error, don't just keep trying to register.
     // Require the user to click a button again, or perform
     // exponential back-off.
    }
    return msg;
   }

   @Override
   protected void onPostExecute(String msg)
   {
    // setting registration id in edit text.
    txt_reg_id.setText(msg);
   }

  }.execute(null, null, null);
 }
}

Receive a message

Whenever your 3rd party application sends a message to GCM enabled android app, GCM framework will invoke WakefulBroadcastReceiver. so its WakefulBroadcastReceiver's responsibility to handle the message.
A WakefulBroadcastReceiver is a special type of broadcast receiver that takes care of creating and managing a partial wake lock for your app, so that your application go to sleep while processing the message.

WakefulBroadcastReceiver will invoke IntentService, which will be actually processing the message.

Following is the code for WakefulBroadcastReceiver. it will start the GcmIntentService when it will receive the message.

package com.example.gcm;

import android.app.Activity;
import android.content.ComponentName;
import android.content.Context;
import android.content.Intent;
import android.support.v4.content.WakefulBroadcastReceiver;

public class GcmBroadcastReceiver extends WakefulBroadcastReceiver
{
 @Override
 public void onReceive(Context context, Intent intent)
 {
  // Explicitly specify that GcmIntentService will handle the intent.
  ComponentName comp = new ComponentName(context.getPackageName(), GcmIntentService.class.getName());
  
  // Start the service, keeping the device awake while it is launching.
  startWakefulService(context, (intent.setComponent(comp)));
  
  setResultCode(Activity.RESULT_OK);
 }
}

GcmIntentService will process the message according to the application requirement.
Here it will only send a notifications.

package com.example.gcm;

import android.app.IntentService;
import android.app.NotificationManager;
import android.app.PendingIntent;
import android.content.Context;
import android.content.Intent;
import android.os.Bundle;
import android.os.SystemClock;
import android.support.v4.app.NotificationCompat;
import android.util.Log;

import com.google.android.gms.gcm.GoogleCloudMessaging;

public class GcmIntentService extends IntentService
{
 public static final int NOTIFICATION_ID = 1;
 private NotificationManager mNotificationManager;
 NotificationCompat.Builder builder;

 public GcmIntentService()
 {
  super("GcmIntentService");
 }

 @Override
 protected void onHandleIntent(Intent intent)
 {
  Bundle extras = intent.getExtras();
  GoogleCloudMessaging gcm = GoogleCloudMessaging.getInstance(this);

  // The getMessageType() intent parameter must be the intent you received
  // in your BroadcastReceiver.
  String messageType = gcm.getMessageType(intent);

  if (!extras.isEmpty())
  { // has effect of unparcelling Bundle
   /*
    * Filter messages based on message type. Since it is likely that GCM will be extended in the future with new message types, just ignore
    * any message types you're not interested in, or that you don't recognize.
    */

   if (GoogleCloudMessaging.MESSAGE_TYPE_SEND_ERROR.equals(messageType))
   {
    sendNotification("Send error: " + extras.toString());
   }
   else if (GoogleCloudMessaging.MESSAGE_TYPE_DELETED.equals(messageType))
   {
    sendNotification("Deleted messages on server: " + extras.toString());    
   }
   else if (GoogleCloudMessaging.MESSAGE_TYPE_MESSAGE.equals(messageType)) // If it's a regular GCM message, do some work.
   {
    // This loop represents the service doing some work.
    for (int i = 0; i < 5; i++)
    {
     Log.i(this.toString(), "Working... " + (i + 1) + "/5 @ " + SystemClock.elapsedRealtime());
     try
     {
      Thread.sleep(5000);
     }
     catch (InterruptedException e)
     {
     }
    }
    Log.i(this.toString(), "Completed work @ " + SystemClock.elapsedRealtime());
    
    // Post notification of received message.
    sendNotification("Received: " + extras.toString());
    
    Log.i(this.toString(), "Received: " + extras.toString());
   }
  }
  // Release the wake lock provided by the WakefulBroadcastReceiver.
  GcmBroadcastReceiver.completeWakefulIntent(intent);
 }
 
 // Put the message into a notification and post it.
 // This is just one simple example of what you might choose to do with
 // a GCM message.
 private void sendNotification(String msg)
 {
  mNotificationManager = (NotificationManager) this.getSystemService(Context.NOTIFICATION_SERVICE);

  PendingIntent contentIntent = PendingIntent.getActivity(this, 0, new Intent(this, MainActivity.class), 0);

  NotificationCompat.Builder mBuilder = new NotificationCompat.Builder(this).setSmallIcon(R.drawable.ic_launcher)
    .setContentTitle("GCM Notification").setStyle(new NotificationCompat.BigTextStyle().bigText(msg)).setContentText(msg);

  mBuilder.setContentIntent(contentIntent);
  mNotificationManager.notify(NOTIFICATION_ID, mBuilder.build());
 }
}

Implementing a GCM Server


Project Setup

Download helper libraries from : http://code.google.com/p/gcm/source/browse/#git%2Fgcm-server

Create a new java project in eclipse (gcm-server-sample)

Copy gcm-server/src/com folder to gcm-server-sample/src directory.

Create a new folder lib into gcm-server-sample project.

Copy gcm-server/lib/json_simple-1.1.jar file to gcm-server-sample/lib directory.

Open gcm-server-sample project properties. goto Java Build Path --> Libraries tab and add json_simple-1.1.jar file to build path.

Writing code to send message to android device

Create a new class /gcm-server-Sample/src/test/GCMServerTest.java . in this class we will write a code to send a message to android device.

package test;

import java.io.IOException;
import java.util.ArrayList;
import java.util.List;

import com.google.android.gcm.server.Message;
import com.google.android.gcm.server.MulticastResult;
import com.google.android.gcm.server.Sender;

public class GCMServerTest
{
 public static void main(String[] args)
 {
  try
  {
   sendMessage();
   System.out.println("message sent");
  }
  catch (Exception e)
  {
   e.printStackTrace();
  }
 }
 
 private static void sendMessage() throws IOException
 {
  String API_KEY = ""; //sender id got from google api console project
  String collpaseKey = "gcm_message"; //if messages are sent and not delivered yet to android device (as device might not be online), then only deliver latest message when device is online
  String messageStr = "message content here"; //actual message content
  String messageId = "APA91bGgGzVQWb88wkRkACGmHJROeJSyQbzLvh3GgP2CASK_NBsuIXH15HcnMta3e9ZXMhdPN6Z3FSD2Pezf6bhgUuM2CF74SgZbG4Zr57LA76VVaNvSi7XM7QEuAVLIiTsXnVq3QAUFDo-ynD316bF10JGT3ZOaSQ"; //gcm registration id of android device
  
  Sender sender = new Sender(API_KEY);
  Message.Builder builder = new Message.Builder();
  
  builder.collapseKey(collpaseKey);
  builder.timeToLive(30);
  builder.delayWhileIdle(true);
  builder.addData("message", messageStr);
  
  Message message = builder.build();
  
  List<String> androidTargets = new ArrayList<String>();
  //if multiple messages needs to be deliver then add more message ids to this list
  androidTargets.add(messageId);
  
  MulticastResult result = sender.send(message, androidTargets, 1);
  System.out.println("result = "+result);
  
  if (result.getResults() != null) 
  {
   int canonicalRegId = result.getCanonicalIds();
   System.out.println("canonicalRegId = "+canonicalRegId);
   
   if (canonicalRegId != 0) 
   {
            }
  }
  else 
  {
   int error = result.getFailure();
   System.out.println("Broadcast failure: " + error);
  }
 }
}

Sample App Downloads


Android sample app

You have to update your sender id (Google API project number)

Java server application for sending GCM messages

You have to update API key and registration id of android device to send message in source code.


Creating and Deploying Java Web Application on AWS using Elastic Beanstalk

This tutorial is for creating simple java web application using eclipse and then deploying it on AWS cloud. Video tutorial for creating/de...